Showing posts with label gardening. Show all posts

Sunday, February 26, 2012

Garden planning!

Can you believe gardening season is almost here? I just got some kale seeds to start this week, and i'll be starting sugar snap peas as well.

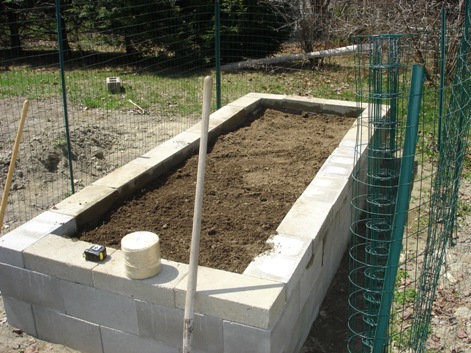
I'm going to do things very different this year. Last year I had, in this order:

melons - beans - blank space - tomatoes - peppers


The melons didn't do so well, and took up a lot of space, so i'll be getting them at the Green Market instead. The beans were great, and a good buffer between the peppers & tomatoes, because they are shorter. I was expecting the tomatoes to take over the blank space, but instead they grew over the peppers, and robbed them of the sun. I got 2 peppers from them all summer. It was all a great learning experience.

This year, I will grow:

bell peppers - beans - tomatoes, in the raised garden, and sugar snap peas in pots. Maybe i'll do another pea tent, but this time on the patio.

I think I might not buy any tomato plants, but instead i'll use my "volunteer plants". Last year I had a bunch of tomato plants spring up where I didn't plant them. I was very excited about them, and asked around. Apparently theses are called "volunteer plants". We should have plenty of these next year! I let all the half eaten tomatoes fall to the bottom of the garden, so there should be lots of seeds in there!


Last year we mixed in our compost with soil from the garden center. This year, we only need to add compost, so the plants should flourish.

Saturday, April 9, 2011

The raised garden is ready!

I decided on tan split face cinder blocks with pavers on top, and i'm glad I did! It looks so much nicer than plain cinder blocks. First I laid them out, leveling them as best as I could as I went. It isn't a giant sized garden... that shovel & wheelbarrow are my son's ;)


I sprinkled cinnamon all around the cinder blocks & garden area to prevent ants. Then I laid down newspaper to prevent any weeds that were below from coming up. A farmer I met at a nutrition seminar gave me that tip. Thanks, Farmer Jim!


After that I had the newspaper in place, and wet it so the breeze wouldn't blow it away, I added the pavers to the top of the cinder blocks.


Since the cinder blocks are 16" long, and the pavers were 15 1/4, I ended up with some smaller spaces to fill, and used bricks & paver pieces I had in the yard. It won't win any awards, but I don't think it looks too bad!


I added the soil, then my helpers helped me get get the compost in from our composter. Thanks helpers!


One helper was nice enough to stick around & help me spread it out.


I can't wait to plant!

Monday, April 4, 2011

Cinder block raised garden


After much thought, I have decided to make my raised garden with cinder blocks. I originally wanted wood, but if I use treated wood it will have chemicals. If I use untreated wood, it will eventually rot, and need to be replaced. I also read that "cinder block raised beds have the added advantage of creating thermal mass which stores heat and warms the soil longer". The down side is that they are ugly, but there are some solutions.

This creative recyclist used mosaic tiles to decorate her cinder blocks:


There's cement stain, and split faced cider blocks, that are more visually appealing like these:


My husband likes the look of the flat pavers on top like this person did...


I kinda like the idea of using the holes to plant things in, like this person did:


I am currently waiting to see if anyone on Freecycle has some cinder blocks that they don't want. If not, I may go with the split face cider blocks. I figure it's worth the extra few cents a block, since it will be a permanent fixture in the yard.